DIY Embellish Your Clothes Tutorial!

At the start of 2019 Davey and I committed to #ayearofnothingnew, which isn’t to say that we haven’t consumed—we have—but that we are limiting ourselves to shopping only secondhand (or artist made when we can!) for our clothes and home goods. And we have stuck to it pretty well! (Though I won’t lie, there have been a few cheats. Like when we found an amazing and clean king-size down comforter at the thrift store, but despite searching so hard for months never came across a king-sized duvet. I finally broke down and picked up an organic cotton one from Target.)
One of the wonderful and unexpected creative challenges to this commitment has been a desire to make-do and repair the things we already have! I’ve been so inspired recently by the likes of Jessica Marquez and Zero Waste Daniel to reimagine how I consume, use, and repurpose clothing. And so, here is a teeny tiny tutorial for how I have been adding a little flair to some of my long-time favorite staples of my wardrobe and maybe you can use it to spice up a piece of your own rather than tossing it out!


Item of clothing to embellish
Embroidery hoop for support (I used a 3 inch hoop)
Black Pearl Cotton size 8**
A Note on Clothing Selection: Really stretchy fabric can be tricky to stitch on, but it is not impossible with a little patience! If you are a beginner still finding your embroidery legs, you might want to stay away from things like t-shirts and stick with more stable fabrics like denim!

Begin by laying out your design. I used approximately 5 packs of my Daisy Peel + Stick Transfers to create these densely packed daisies on each sleeve. I know that is a lot, both in terms of cost and material and time, so of course feel free to simplify and keep things manageable for yourself!

Peel + stick each design directly onto the front side of your fabric.
Peel the backing off of the transfer and place sticky-side down on the front of your fabric. Trim the transfers to fit together creating the appearance of an overlapping design without actually overlapping the paper and adding extra layers to stitch through.
For me, it works best if I trim the design before I peel + stick, but I encourage you to work however feels the most comfortable for you!
And remember, your placement is not permanent! You can always change your mind and move things around!

Trim the peel + stick design transfers to fit together without actually overlapping.

Follow the printed pattern lines with backstitch.


Use black pearl cotton (I prefer size 8) and backstitch to complete the project following along the printed lines of the design. Use the embroidery hoop to stabilize the area you are working on.
I threaded my needle and tied a knot at one end, leaving the other end loose. Some folks will tell you not to use knots—that it isn’t the proper, correct way to stitch, and while that may be true, I don’t adhere to that way of thinking. Likewise, when I have just a couple inches of thread left, I tie another knot on the back side of the fabric to keep the stitching in place. It makes the inside of the sleeve look a little chaotic, but that doesn’t bother me!

You may notice that the yet unstitched transfers move around a little when you put your fabric in the embroidery hoop.
Don’t fret! Just re-stick the design where it belongs and stitch it down! For this reason I found it easiest to place only a few flowers at a time, rather than laying out the entire sleeve all at once.

Notice that the small flower on the right has shifted away from its neighbor.

I peeled that drifting flower off and re-stuck it where it belongs.

I’ve partially stitched down the first few flowers, now I am laying out the next batch!

Once your stitching is complete, wash away the peel + stick transfer paper under hot water. If you need to, you can use your finger/finger nail to help scrape away any little bits of paper stuck right around your stitches, but it should totally dissolve with the water!
Next, let your piece dry!
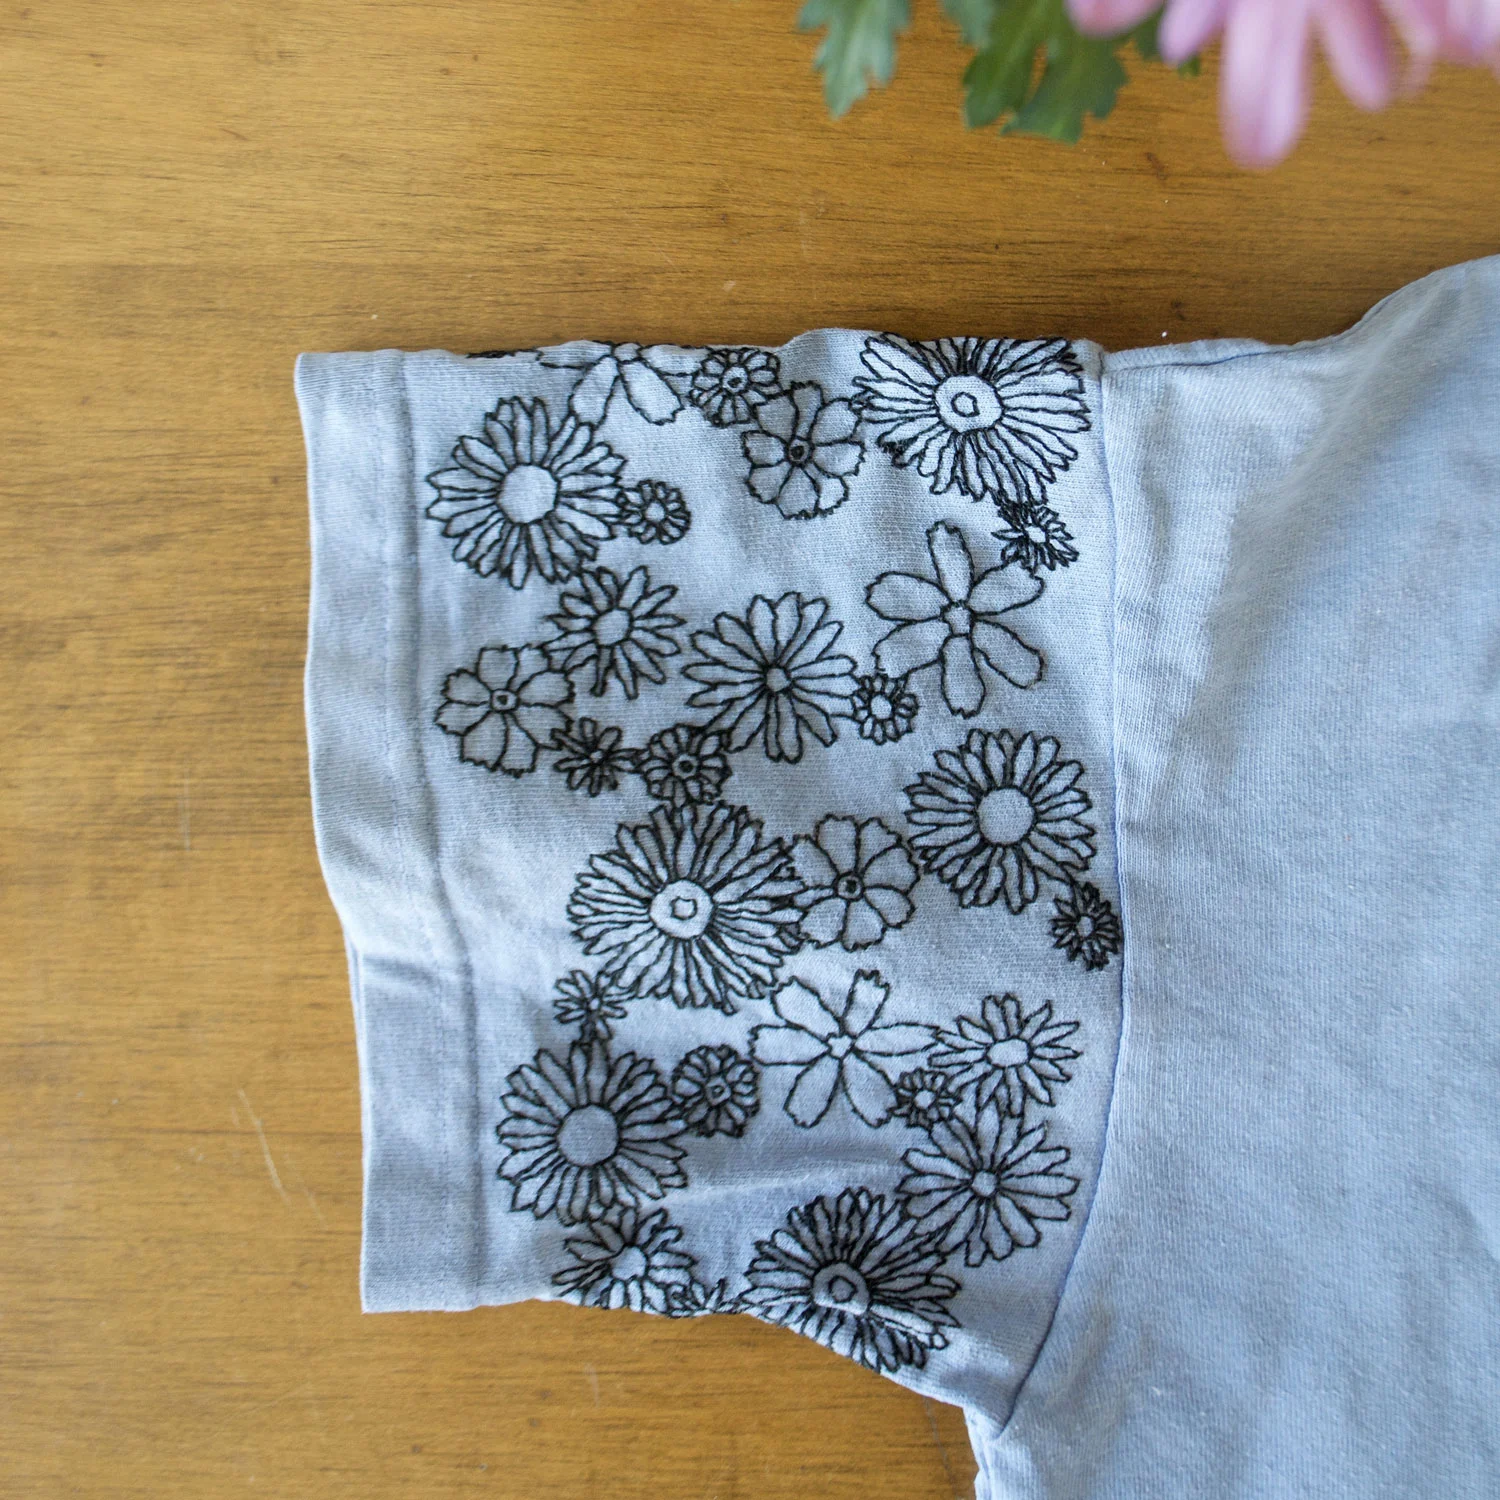
I completely finished the stitching on this sleeve and washed away the transfer paper.
You may notice that the fabric and stitching are a little stiff once they have completely dried. This stiffness will lessen with time and use. I run my hand-stitched clothing through the washing machine—sometimes on gentle, but mostly on ‘normal’ in with the rest of my laundry. So far, I haven’t noticed any kind of damage caused from washing. Embroidered elements on clothing and home textiles have been around for as long as needles have existed (literally thousands of years), so don’t be afraid to wear and use your stitched goods!

One sleeve down with the second in progress!
*If you already have designs that you want to use (some of my digital patterns for example) and are looking for blank peel + stick stabilizer, I like the 8.5 x 11 sheets of water soluble stabilizer by Pellon. That is not the only brand or option out there, but it is what I use.
**You can, of course, use any color/type of thread that you want! And if you are in the USA, you can use coupon code SKBXDMC at dmc.com for 15% off your purchase!
