Craft With Conscience: Corrie Beth Hogg + Tutorial!
Corrie Beth Hogg // Paper Artist // Brooklyn, NY
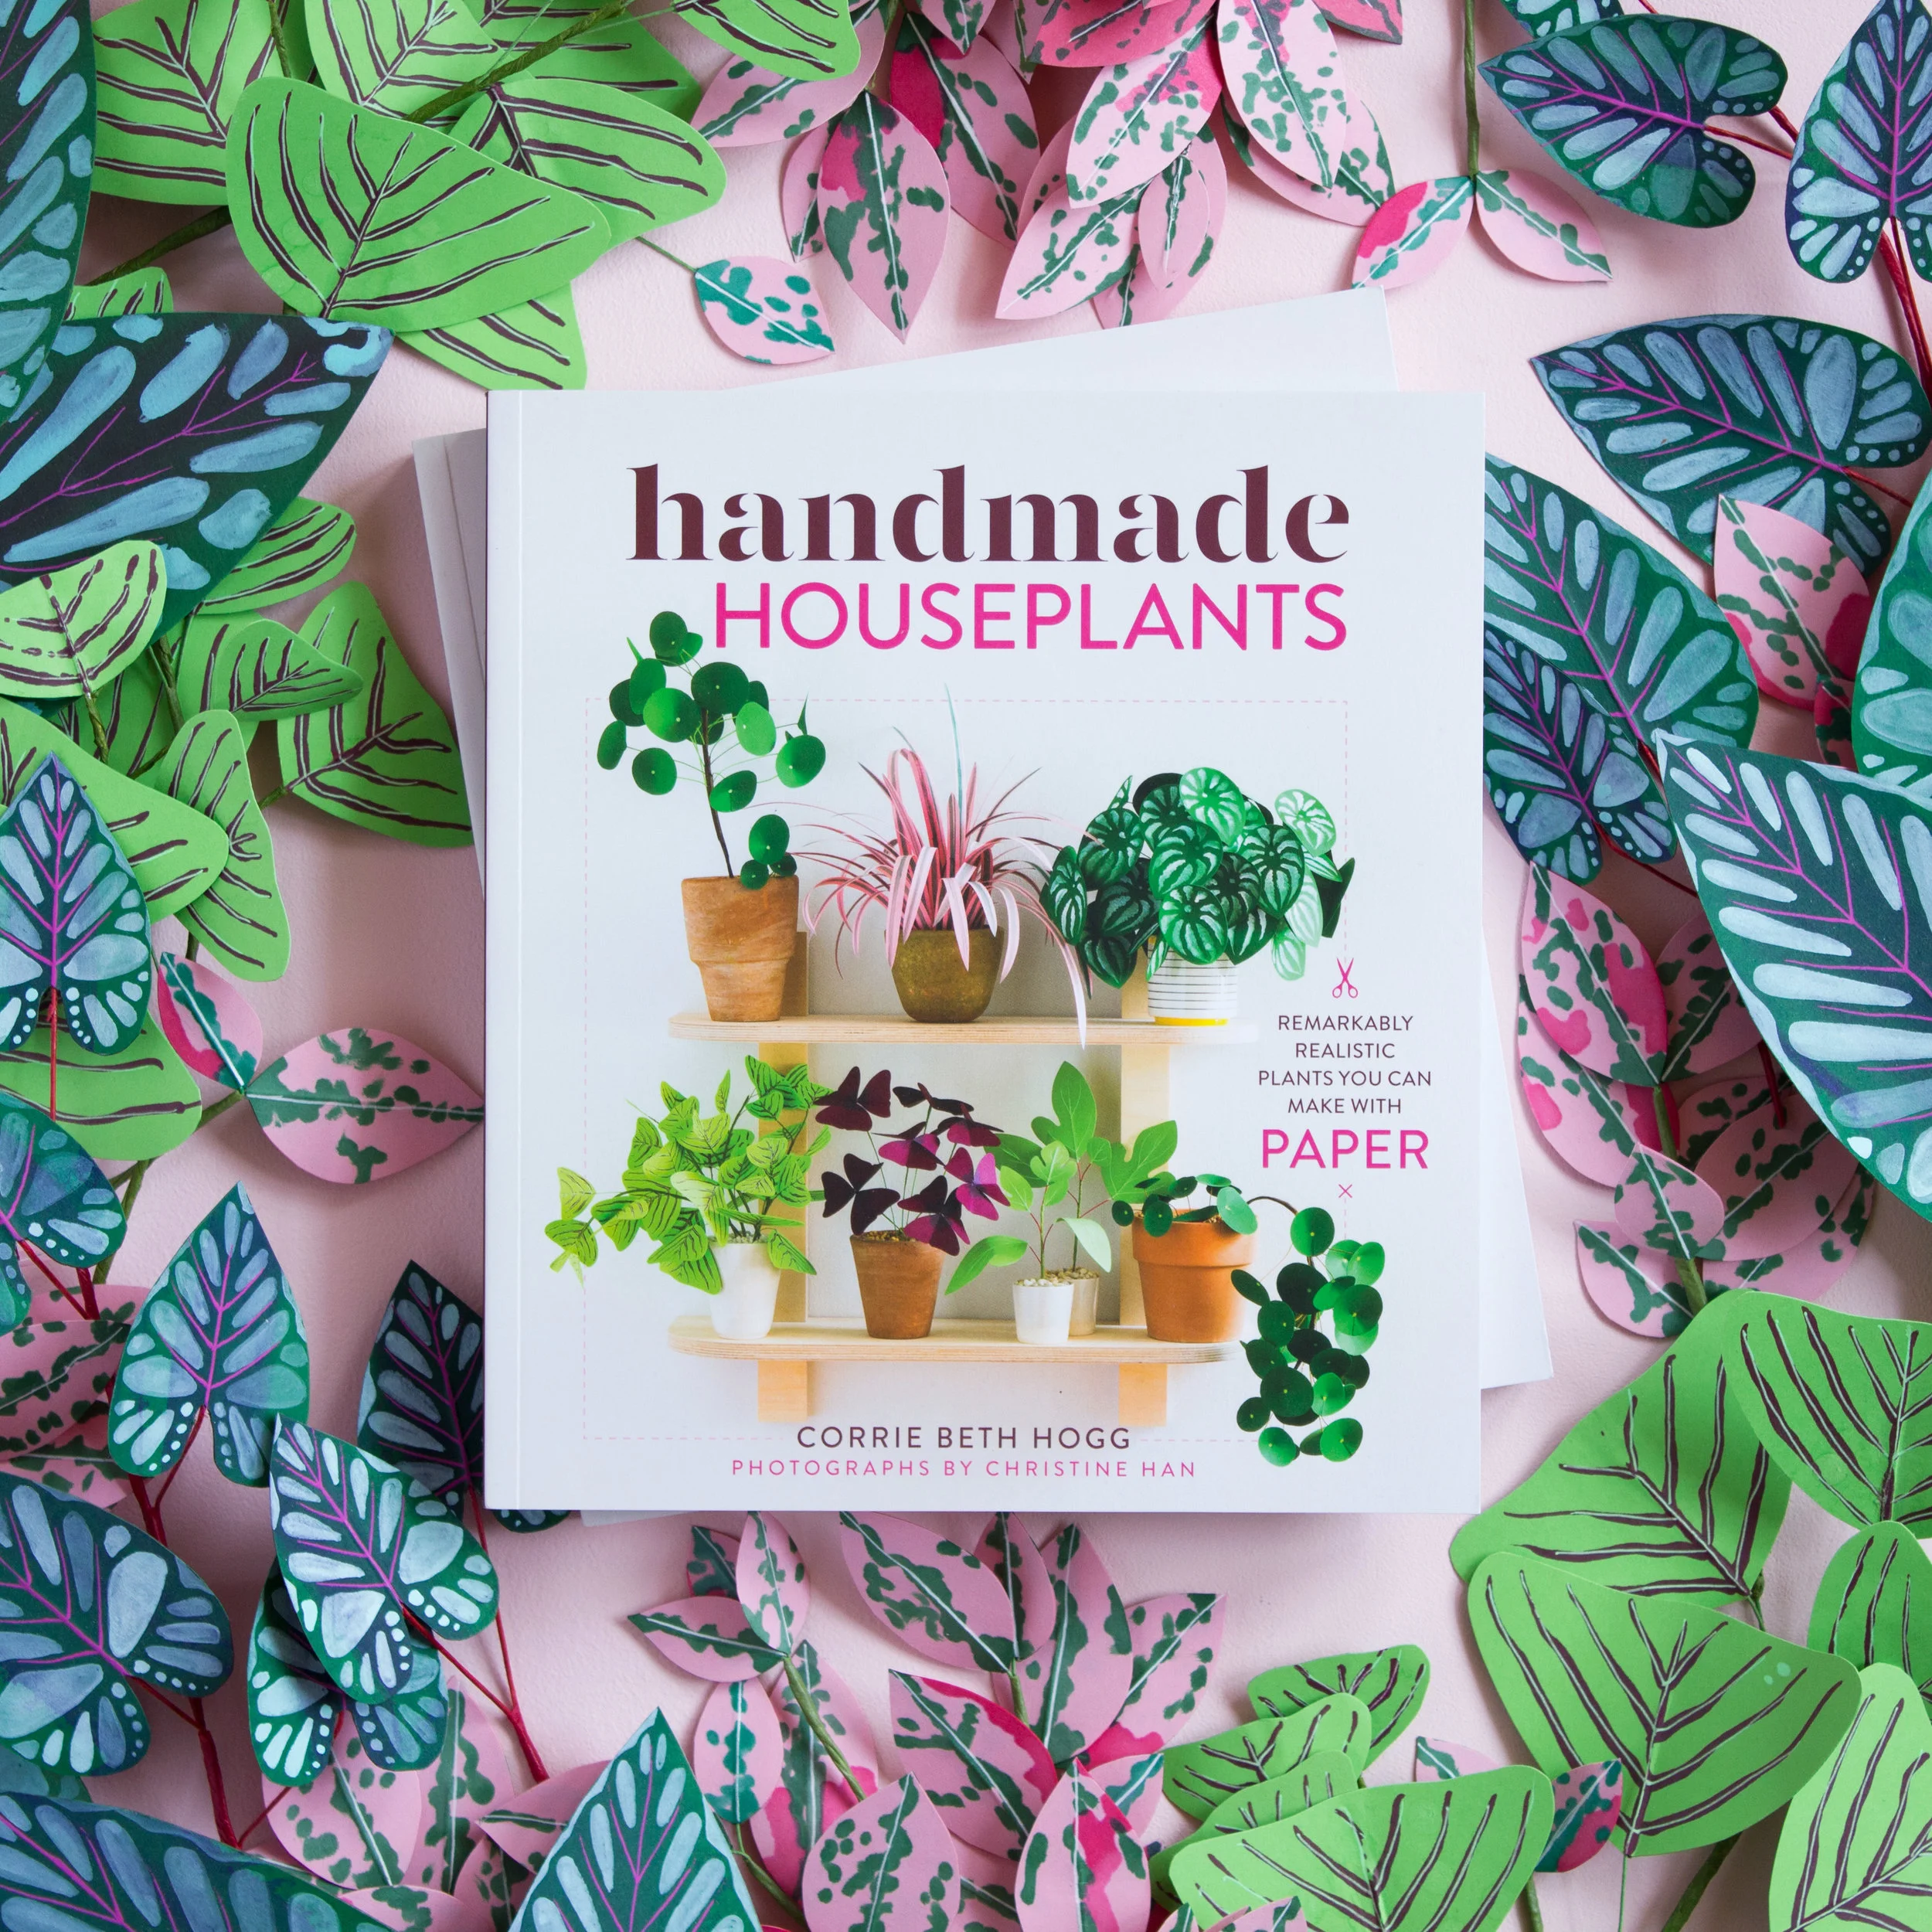
Corrie Beth Hogg is a lifelong maker. She is currently crafting realistic plants out of paper, and has recently published a book on the subject entitled ‘Handmade Houseplants: Remarkably Realistic Plants You Can Make with Paper’ . Corrie has long been inspired by nature, from growing up near a national park to a season spent working the fields at an organic farm, she has always strived to integrate the natural world into her creative process. She studies plants, interpreting their visual signatures and details into digestible, clear steps, showing those with even the blackest of thumbs how to recreate them with paper.
Check out her book as well as her amazing work at HandmadeHouseplants.com and her Instagram.

Photo Credit: Christine Han
1. I began my #CraftWithConscience series as a way to simultaneously promote the work of other makers and to discuss the complicated issues surrounding creative inspiration and developing one’s own visual vocabulary. The internet is an ever-growing fixture in many artists’ lives and businesses, could you talk about the role the internet plays in your artistic and professional life?
Like so many of us, I use the internet daily, both in my day job as an art director and in my personal studio practice. It’s so ingrained now, it’s hard to remember life before. In college I kept a lot of scrap books and sketch books. I filled them with things I cut out from Art in America and National Geographic, not so I could copy what I saw, but so I could remember why I liked it. I use the internet much the same way. And, it’s so much easier now to find and share the things you like. I certainly don’t miss loading slide carousels.

Photo Credit: Christine Han
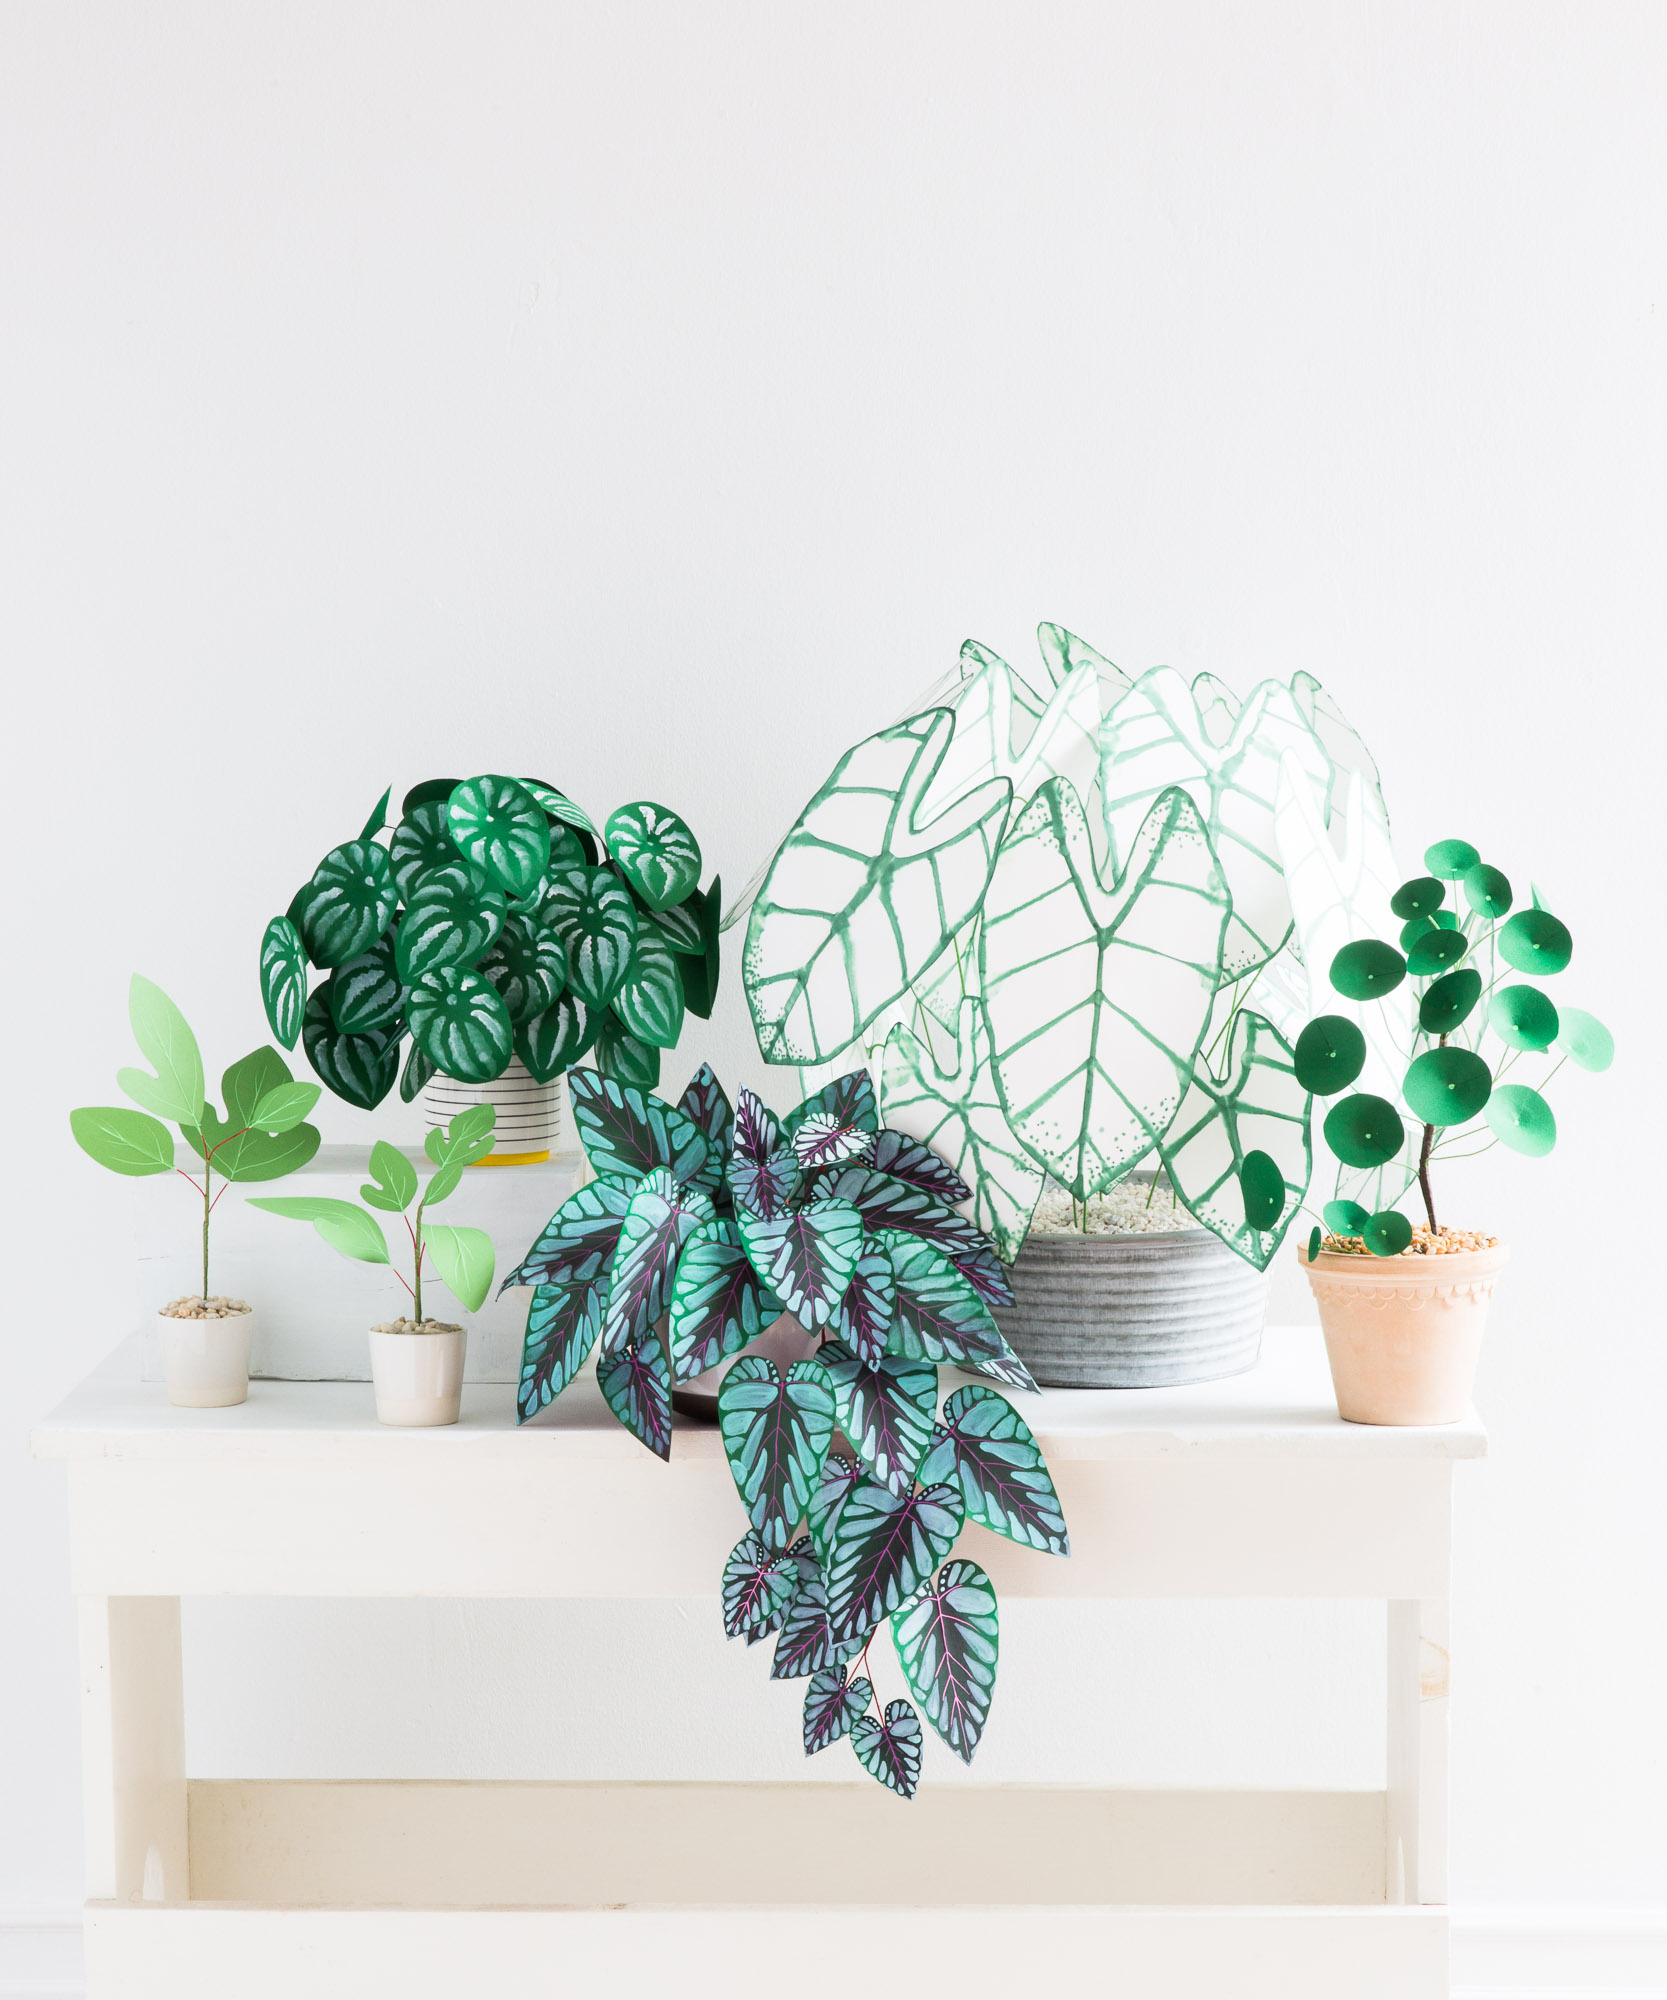
Photo Credit: Christine Han

Photo Credit: Christine Han
2. Where do you find inspiration for your work? In what ways has the internet and/or social media impacted your design process?
I live about a ten-minute walk from the Brooklyn Botanic Garden and I am there nearly every weekend, taking pictures of plants and gaining inspiration. I love to get close-up images (just with my phone) of where branches connect or how a plant changes right where it’s about to go into the soil. I also use Pinterest to save images of plants. I scour the internet, searching garden-center websites, seed catalogs, botanical garden sites, searching for photos of the plants I love and want to make from paper. I save them all and reference it often when I sit down to craft. Of course, I love Instagram too. And, I’m sure as many people have said when they answer this question, I love the people I’ve connected with and the small community I’m a part of. But, I don’t love the competitive nature of it. I have to make a continuous conscious effort to not care about likes and follows. It can get toxic and unhealthy quick, so I strive to stay positive about it. I do appreciate how Instagram is like a portfolio, there for anyone to see and so easy to update. Unlike a website, that someone would actively have to be looking for, on Instagram someone can just stumble upon you or you, them. That’s great!


3. How have you, as an artist, found your creative voice?
Trial and error and persistence … or stubbornness! I’ve always known I wanted to be an artist and began making dolls, painting, and quilting when I was just eight years old. Throughout my creative life, I’ve always just followed my nose. If I wanted to make fabric sculptures, I learned how to translate what I envisioned into 3D soft forms. If I was interested in making musical instruments, I learned how to use a lathe and a planer. I spent a few years making collages, painting, photographs; I’m always spending time in the studio, working on something. I made my dining table and bedroom furniture because I thought it would be more fun and rewarding to make it than to buy it. That’s how I got into making paper plants … I simply wanted a fiddle leaf fig for my living room, where there is not enough light, so I made one from paper. That was four years ago, and I’ve been making paper plants ever since!

4. Sites like Pinterest and Instagram are popular places for artists’ to share their own work. They also act as public visual archives, often leading to creative work by others that walks the line between ‘inspiration’ and ‘infringement.’ Have you encountered copies of your work online and how does it affect you? What are your strategies for dealing with it?
I have only seen my images used without credit given a few times. It’s a drag and is a real disappointment. I usually write to them and ask that they credit me. That is typically enough to get it changed. As far as outright copying, I haven’t seen too much of it, and it’s harder to police, especially in my medium. There is a long history of paper flower making and with many artists in the field, it’s not that surprising if other people are doing similar things as me. Paper plants are a natural progression from paper flowers, but I have my way of doing it and my way of photographing them that is unique! There is one instance that comes to mind. At my job, I frequently create content for online. And, through the magic of social media… I discovered one of my ideas was copied by none other than the Kardashians! (Or, more likely, whomever works for them… but even still, I laughed for a few days!) Hey, imitation is the sincerest form of flattery, right?


5. Do you have any advice for aspiring artists or creative business people?
Well, I still have a day job, so I don’t know that I’m qualified to give business advice. But, I will say, and this is true for my job and my own work… search for inspiration everywhere, not just from people who are making similar art as you. I find that experiences fuel me: music, museums, movies. I can spend an afternoon just looking at Victorian patterns, or simply learning about the tools graffiti artists use. Stepping outside of my box or routine sets off new synapses in my brain. They say inspiration “hits” you … but to me, it’s more accurately described as you put on your best cleats, your cap, and you’re carrying your favorite bat, ‘cause you’re ready to “hit” it. I don’t really know anything about baseball, that’s just my cheesy way saying… don’t sit back and wait for it to happen, nor should you try to play exactly like anyone else. You’ll have the most success if you’re not trying to be the next Babe Ruth, but if you’re only ‘borrowing’ how he positioned his left big toe, and the rest is all you. Be inspired by a lot of things, learn what you like, then take as many swings as you can! Thank you for humoring my mixed (baseball) metaphor. I’d also like to add… you just have to be brave. It’s ok to be scared to fail, or scared even to succeed, just keep going! (I have to give myself this same pep talk weekly!)

Photo Credit: Christine Han

6. Do you have any favorite blogs, artists, or Instagram accounts that you’d like to share?
On Instagram, I love to see what Aviva Rowley is doing. I also like looking at Cabana Magazine, Lili Arnold, Mike Schultz, Robbie Honey, Mona Chalabi (I love her so much), Cutter Brooks Shop, Botticelli Ceramics, and Rosie Li, who makes super cool lights!
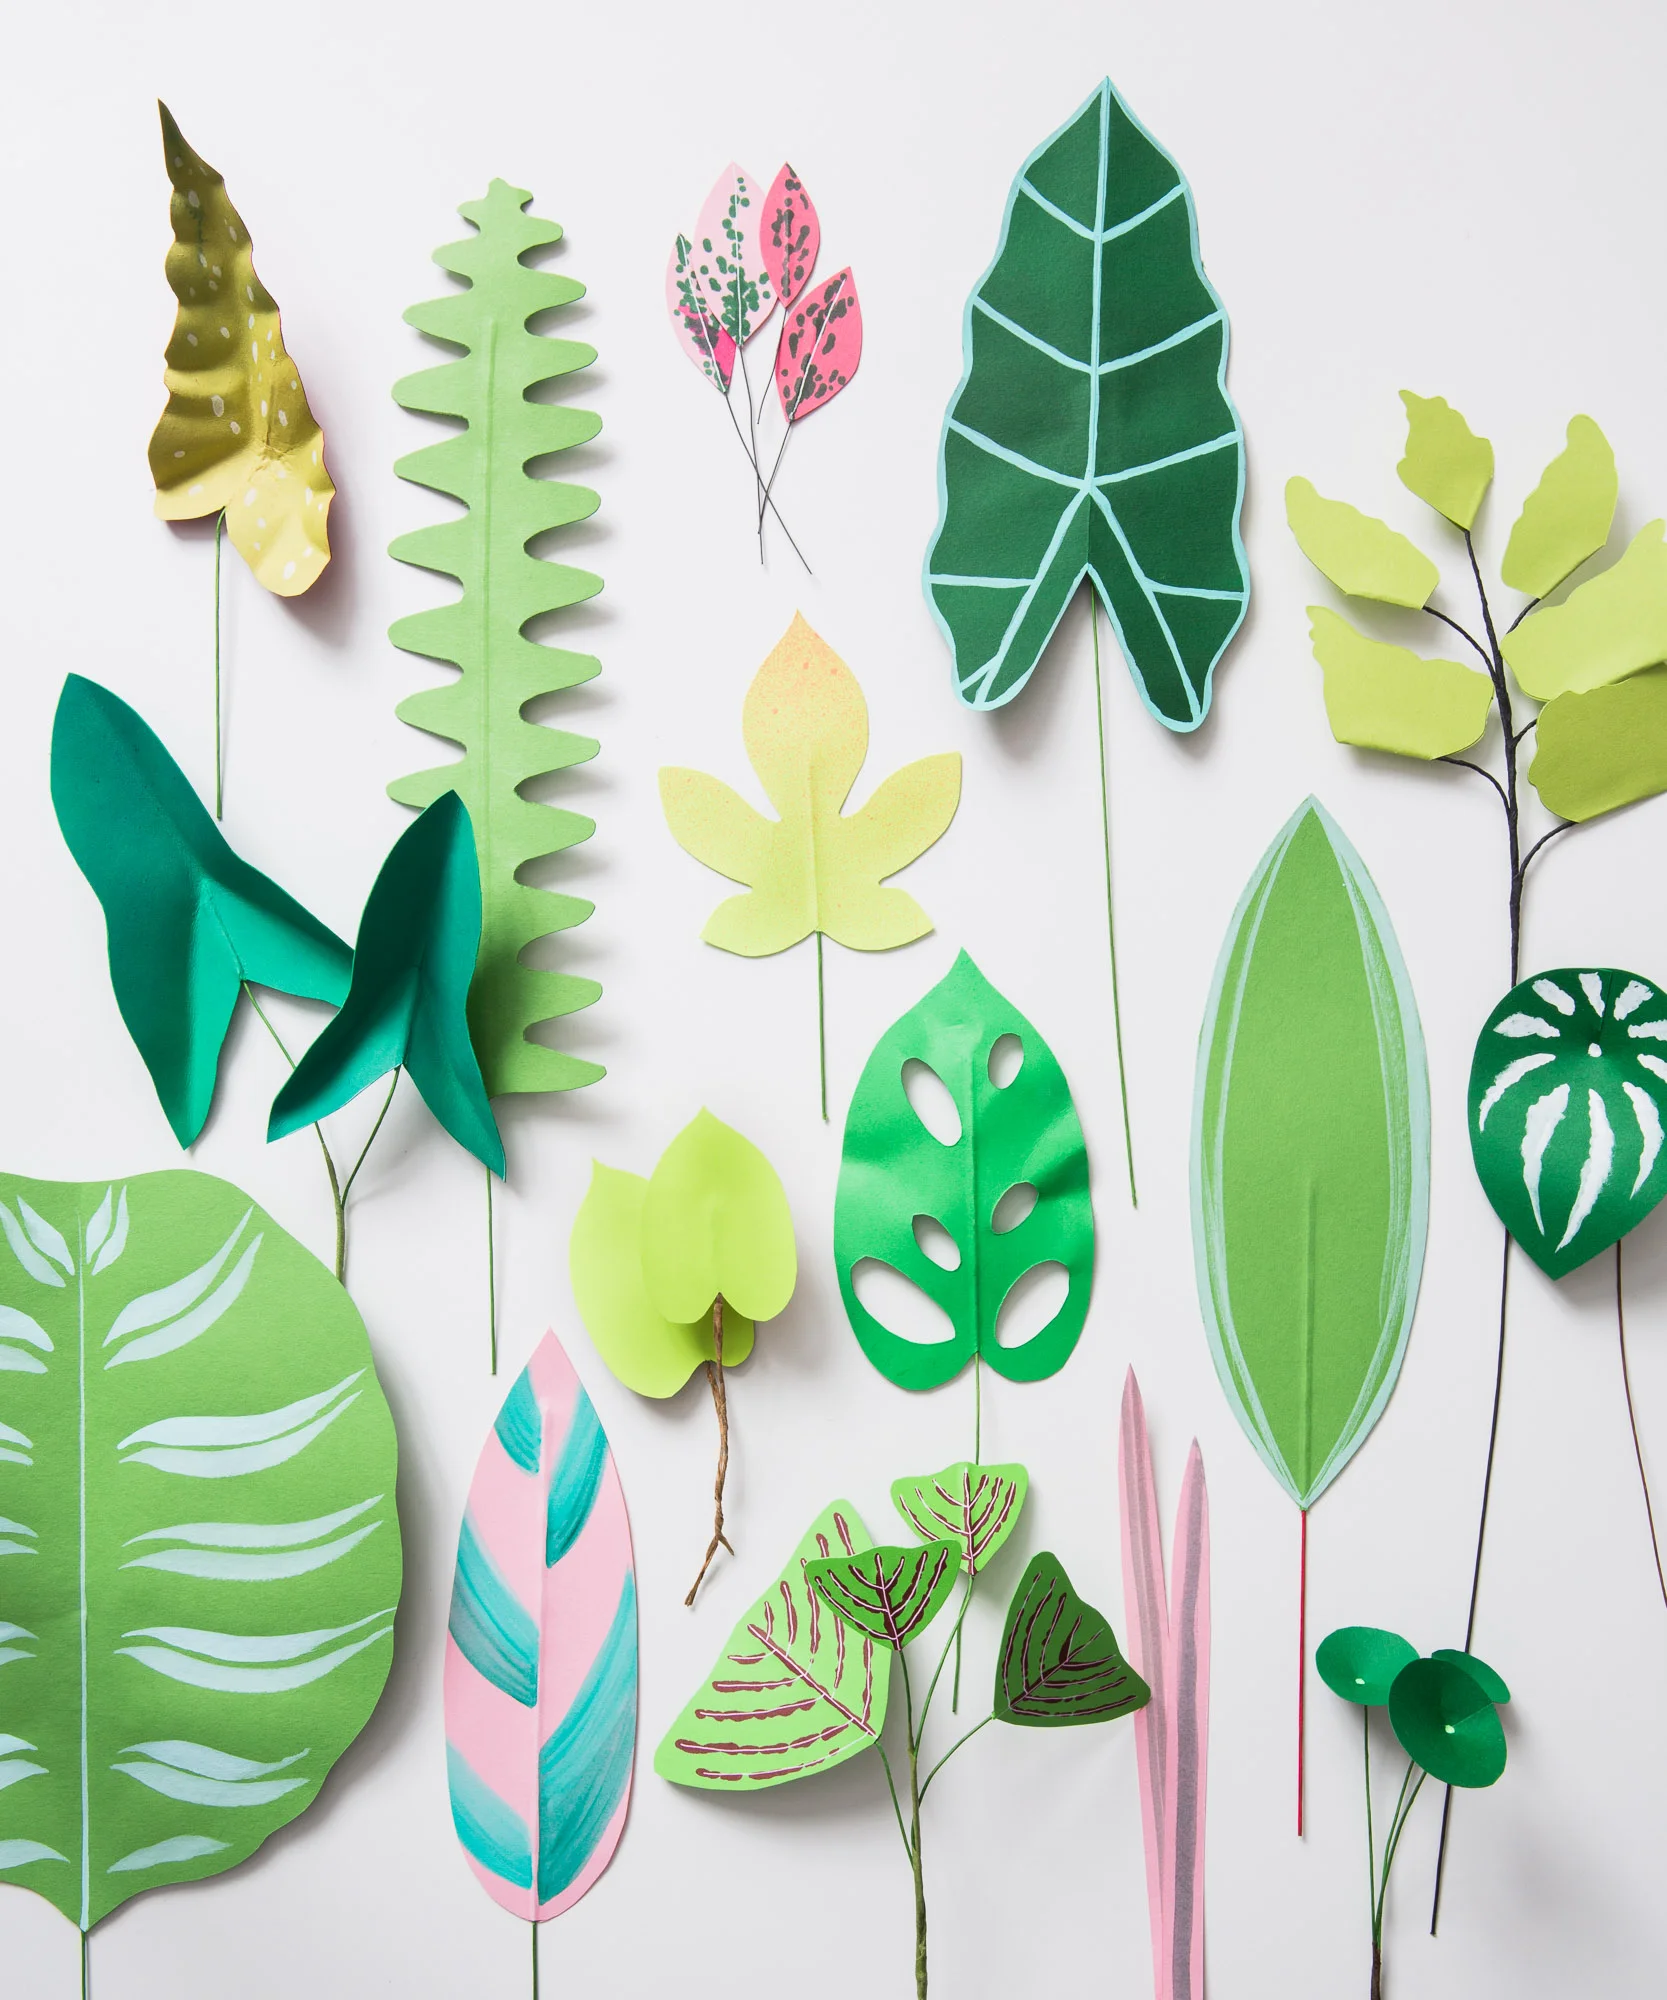
Photo Credit: Christine Han

Photo Credit: Christine Han

Photo Credit: Christine Han

Photo Credit: Christine Han
Paper Squash Vine Tutorial!

I fell in love with squash and cucumber vines during the summer I spent on the farm, I love their large, deeply folded, vibrant green leaves and curly tendrils! It’s a shame the leaves fade and wilt as the fruit starts to mature. So, why not suspend that special moment in time with PAPER? I made a large plant here … but you could, in less time, craft a single vine for a stunning statement piece in a vase. Happy crafting!
-Corrie
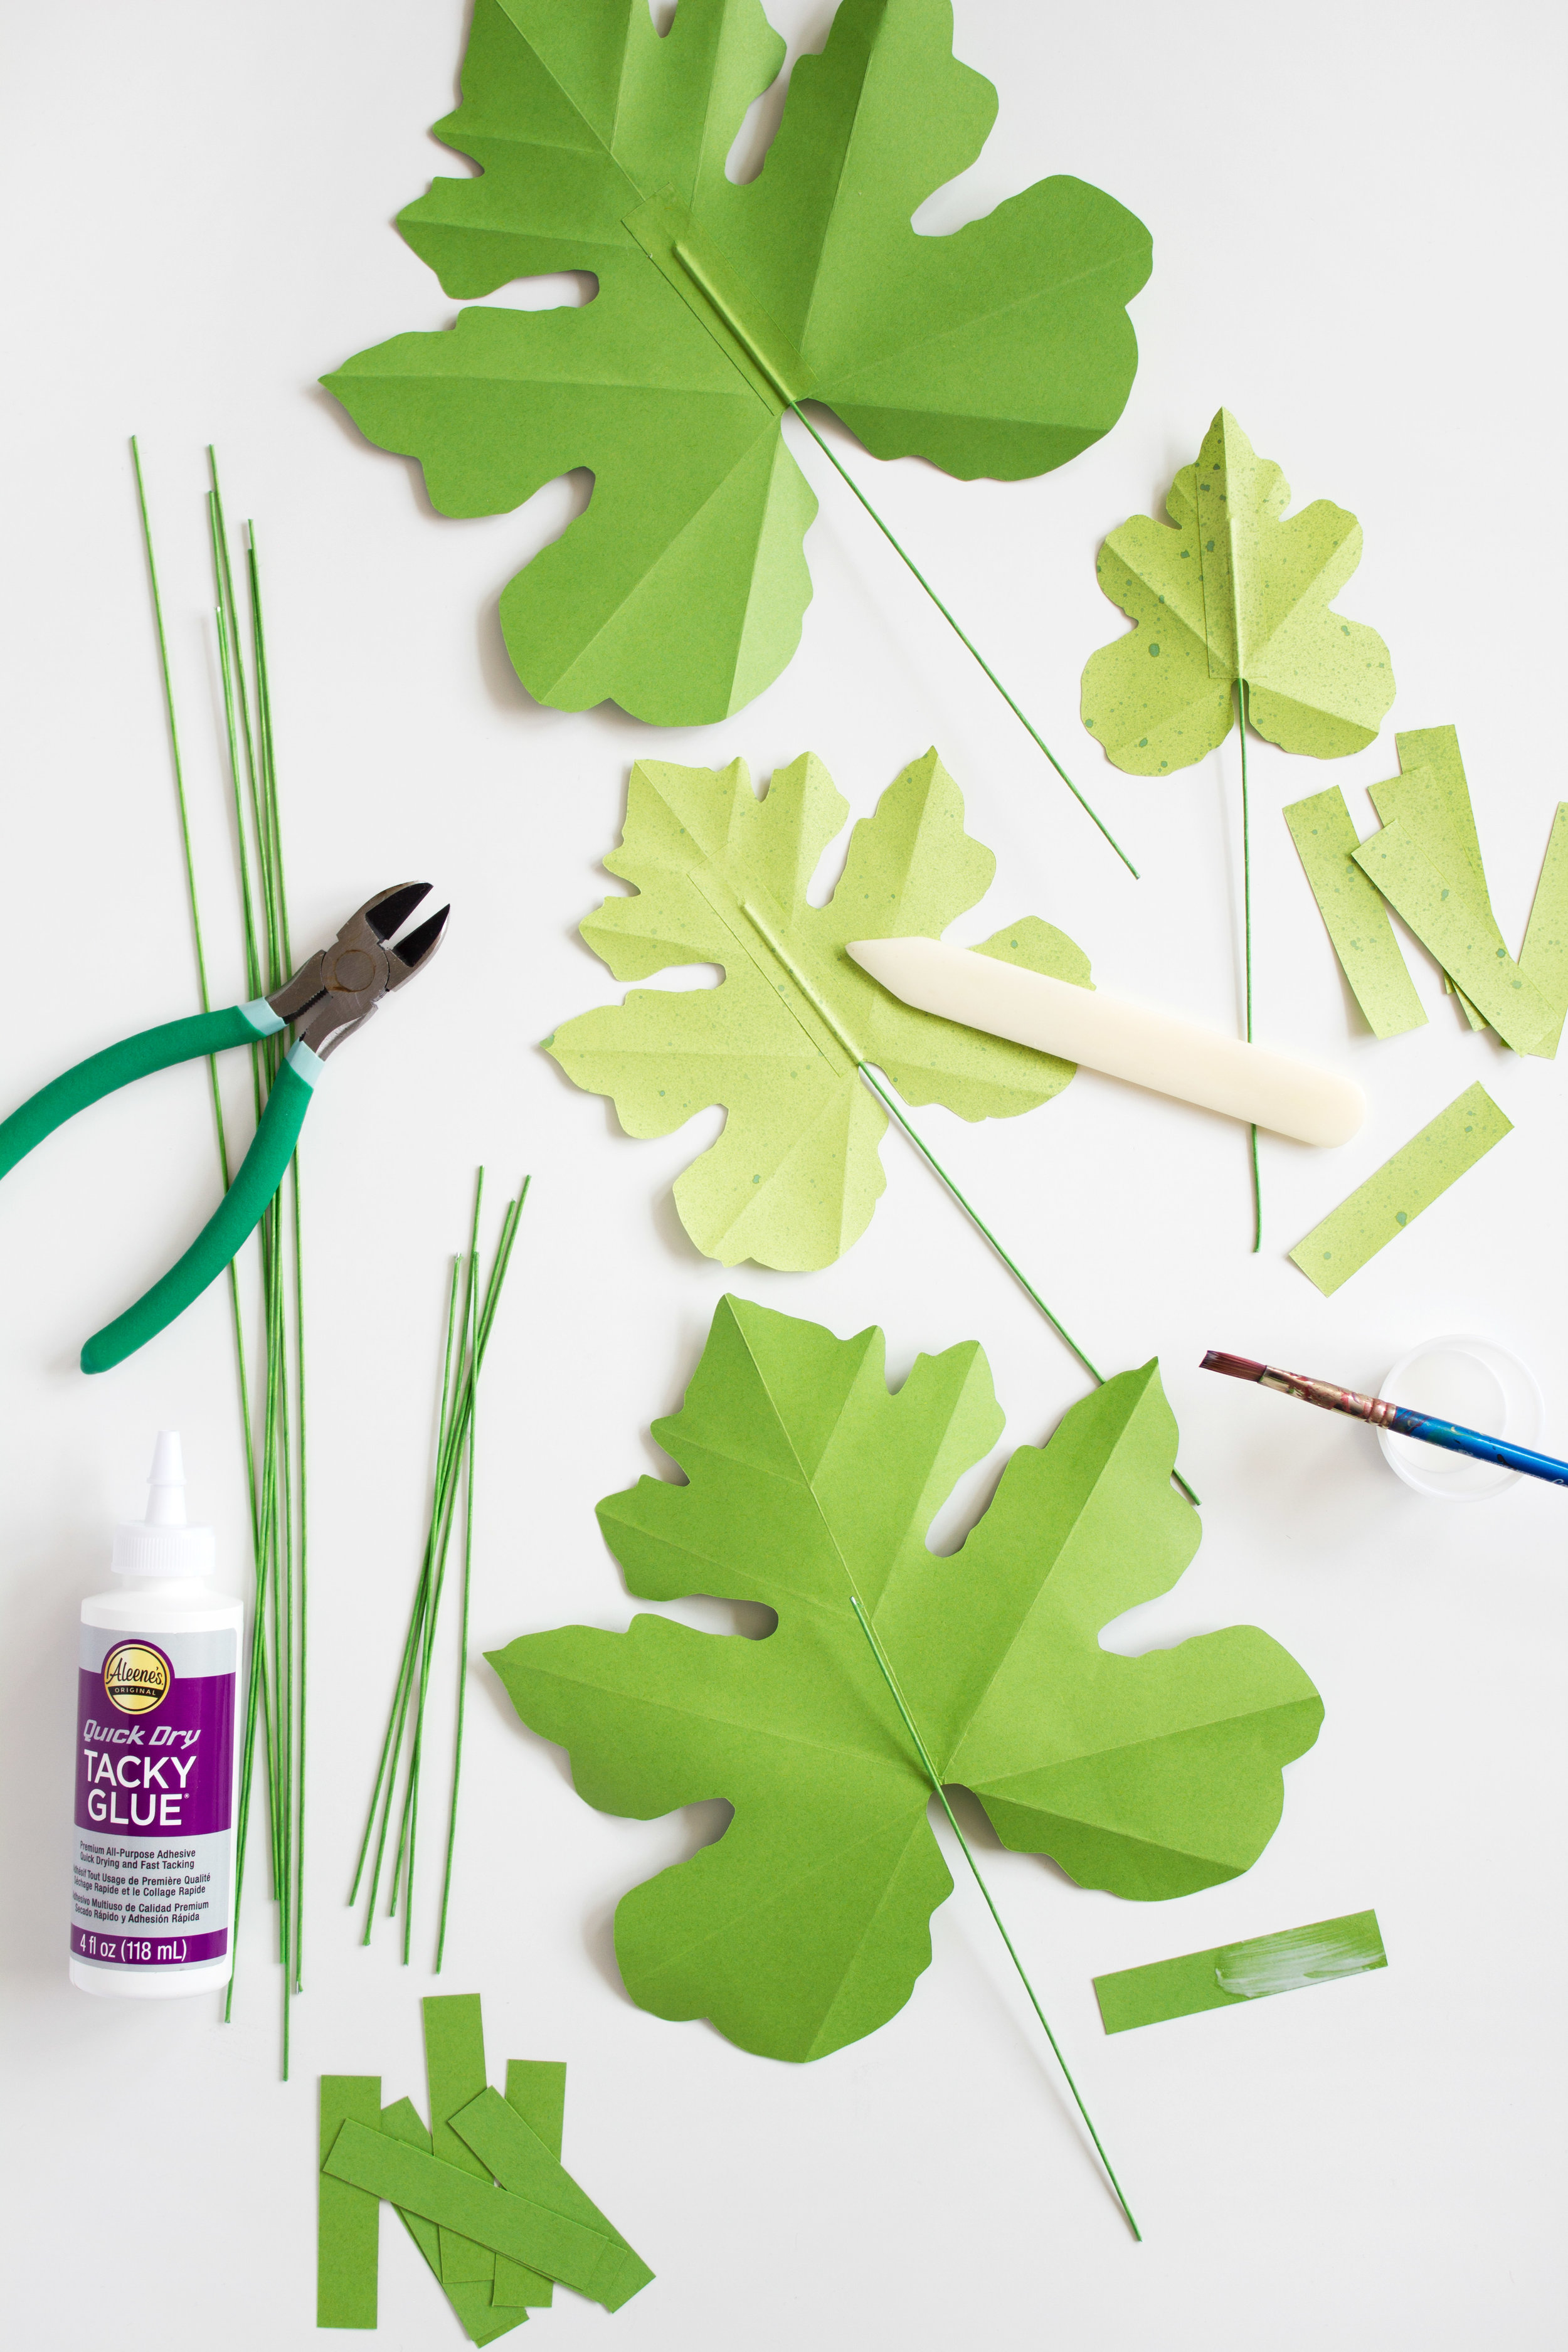
Tools and Supplies:
A. Pot or vase of your choice
B. Foam and craft knife to cut the foam
C. Gravel of your choice
D. Small spray bottle and containers for paint and glue
E. Yellow and green acrylic paint (to mix your own, or just a bright green)
F. Bone folder and pencil
G. Wire cutters
H. 18-gauge green and 20-gauge light green straight floral wire, 1/8” armature wire, green floral tape
I. Scissors, X-Acto knife, cutting mat
J. Text-weight paper in two bright shades of green
K. Bright-green and yellow gel pens
L. Aleene’s quick-dry tacky glue
M. Paint brush, skewer, or other small round objects
N. Small flat brush to apply glue
P. Ruler (optional)
Step 1:
Mix yellow and blue paint together to create a light-green color. Liberally mix the paint with water until it has a runny consistency.
Fill the spray bottle with the watered-down acrylic paint mixture.
Then, use the spray bottle to add a mist of green spray across each sheet of light-green paper. Once dry, repeat on the other side.

Step 2:
Using the templates provided, trace and cut out the leaves. Use the medium and small templates for the light-
green painted paper and the largest template with the darker green paper. Next, using the scraps, cut paper
strips, one for each leaf, matching the color of the leaf. The strips should be approximately 2- 3” long by 3/4”
wide. We’ll use these in step 4.

Step 3:

1. Fold the leaf along the centerline.
2. Approximately 1.5” from the tip of the leaf, fold a 45° angle.
3. Fold another 45° angle approximately 1” below the first.
4. Add a third 45° angle fold, starting at the center crevice of the leaf.
5. Unfold the three 45° angle folds and fold the bottom portion up at an approximate 75° angle, also starting at the center crevice of the leaf.
6. Unfold the last fold and add a final 45° angle fold to the bottom portion of the leaf, also starting at the center crevice of the leaf.
7. Press all the folds with a bone folder. Unfold everything and manipulate the creases on the right side of the leaf to fold the other way. Repeat for all the leaves.
Step 4:
Trace the creases, drawing veins with the yellow gel pen on the light-green leaves and the bright-green gel pen with the dark-green leaves.

Step 5:
Using wire cutters, cut the 18-gauge wire in half. Place a wire along the center of the leafs back and coat
a strip with tacky glue. Cover the wire with the glue-coated strip and secure it in place by running a bone
folder along the contours of the wire. Repeat for all the leaves.
Step 6:
Create the tendrils by wrapping the 20-gauge wire around a paintbrush handle or skewer. Make sure to leave approximately 3” of the wire straight.


Step 7:
Uncurl a portion of the armature wire and attach a couple small light-green leaves to the end, along with a tendril, using floral tape.
Move down the wire a few inches and attach a larger leaf. As you work down the length of wire, add more leaves and tendrils, fully covering each connection with floral tape.
If you’ve never used floral tape before, it takes a little getting used to … it’s not sticky like regular tape. The adhesive is released when the tape is stretched.
Pull the tape at an angle, lightly stretching it as you work and wrap it around the wire, pressing it in place as you go.

Step 8:
Carefully bend each leaf to alternating sides and position the tendrils so they are visible.
Next, fill your pot with foam, making sure it is snug, and cover the foam with the gravel you chose.
Insert the stems into the foam and carefully arrange your plant so that it’s balanced but not perfectly symmetrical. Adjust the angle of the leaves to your liking.
You can find more paper plant tutorials in Handmade Houseplants: Remarkably Realistic Plants You Can Make with Paper!

You can order Handmade Houseplants Amazon, Barnes and Noble, or IndieBound!
All images provided by the artist.